Saturday, August 9, 2014

Quick Pasta with Basil, Roasted Tomatoes and Parmesan


My good friend Emily sent me a text a few weeks ago and asked for an easy dinner option for her family.  I use this recipe all of the time, and I don't know why I've never posted it.  It's a family favorite and it's probably the quickest dinner you'll ever make.   It's a summer meal that really hits the spot.  My kids love it, but they tend to pick around the tomatoes.  I hope that eventually they will start to love them like I do ;)  I personally think the tomatoes for this dish are so good that I save any leftovers to munch on throughout the day.  They are sweet and salty and super juicy.  Another bonus is because this meal requires so few ingredients that there is very little clean up.  Enjoy this easy breezy pasta dish!
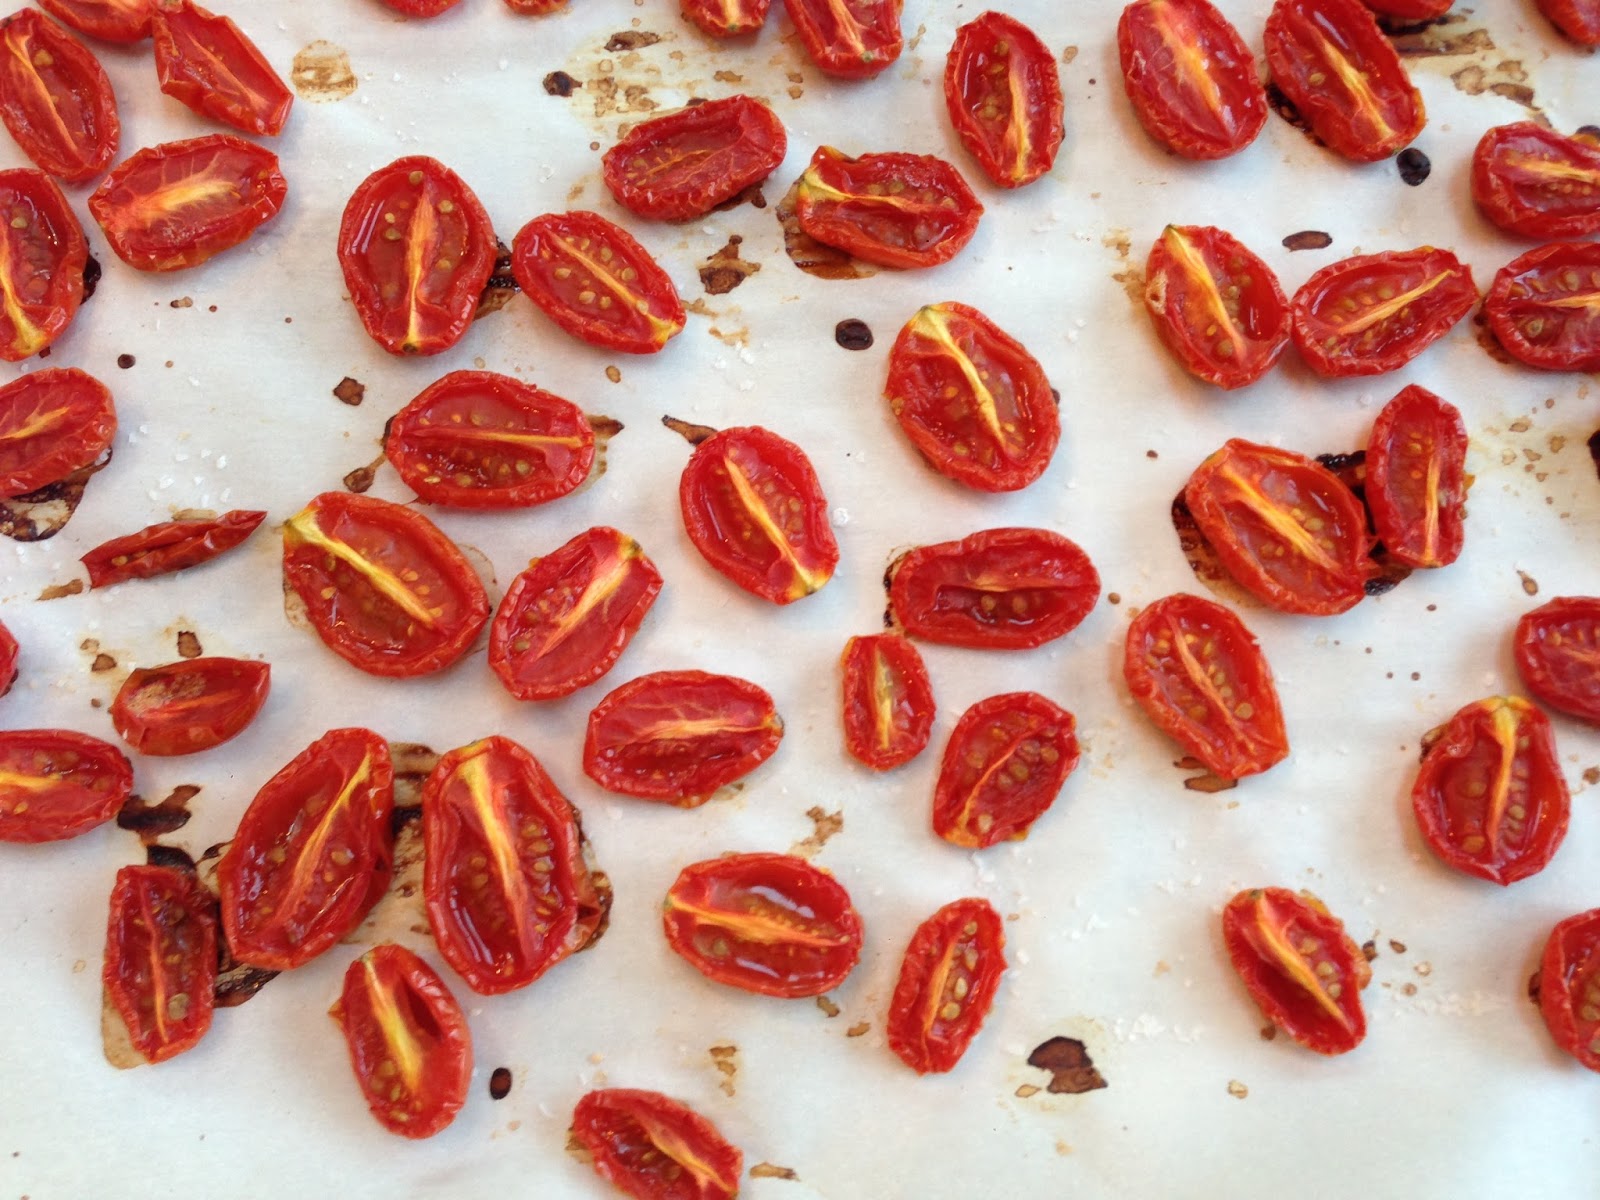

Roasted tomatoes are my favorite!

La Recette:

Ingredients-
1 lb. gluten free pasta of choice - Penne, Rigatoni, or Spaghetti work well (if you don't need GF regular pasta will work too)
1 pint grape tomatoes, sliced in half
2 cloves garlic, finely minced
1/2 cup parmesan cheese, plus extra for garnish
1/4 basil, finely chopped
2 tablespoons Extra Virgin Olive Oil
1 1/4 teaspoon kosher salt
1/2 teaspoon freshly ground black pepper
1/4 teaspoon red pepper flakes, optional

Supplies-
Large Sauce pan
Slotted spoon
Baking sheet
Parchment paper
Colindar
Chef's knife
Measuring cups and spoons
Cutting board
Grater

Directions-
-Pre-heat oven to 400 degrees
-Line a baking sheet with parchment paper and spread the sliced tomatoes out evenly, sprinkle with salt and place in the oven for 20 minutes.  After 20 minutes, remove from the oven and set aside.  This step can be done in advance.  Tomatoes can be kept in the refrigerator for a week.  
-In the meantime, bring a large pot of water to boil.  As soon as you have a rolling boil, sprinkle in 2 teaspoons of salt and a tablespoon of extra virgin olive oil.
-Cook the pasta to al dente, mixing frequently (especially with GF pasta).  *Make sure to reserve 1/2 cup of the pasta water before you drain it.  
-While the pasta is cooking, grate the cheese and chop the basil.
-Drain the pasta and put it back into the sauce pan.  Add in the garlic and tomatoes while the pasta is still hot.  Wait five minutes and add in the basil and cheese.  Mix well.
-Next, add in the Extra Virgin Olive Oil, reserved pasta water, kosher salt, pepper, and pepper flakes if desired.  Mix well, making sure everything is combined.  
-Garnish with extra Parmesan, serve warm and enjoy!

-Serves 4 adults


Saturday, August 2, 2014

Seafood Salad


This salad is probably one of my favorite dinners to make in the summer.   Paired with a mojito or a  rosé wine, it's fabulous.  It's light, healthy and so refreshing.  It's perfect after a day at the beach or the pool.  The sweet, crisp shrimp and champagne vinegar are a delicious combination.  I'll admit that it's not the quickest recipe.  There is a lot of chopping involved but it's completely worth it.  I like to get my mise en place set up the night before, meaning that I chop everything ahead of time, and then cook the shrimp the day I am serving the recipe.  That way the only thing I have to do is mix everything up!  And, my kids it eat!  That's the best part for me.  My kids have trouble with green vegetables but they are good seafood eaters.  Up until now, they wouldn't eat crab readily, but I told them after the fact and they both enjoyed it.  Try this recipe as soon as possible and I hope everyone enjoys their last month of summer!


Chopped and ready to mix.


I really like this rosé and it was delicious with the salad.


Dig in!

La Recette:

Ingredients-
1 lb. shrimp (31-40 count) peeled and deveined*, tails on
1 lb. bluefin jumbo lump crab meat, picked through for shells
3-4 cups baby arugula (or another green that is similar - I happen to love arugula)
1/2 cup cornichons, finely chopped (cornichons are pickles made from tiny cucumbers - Trader Joe's are great)
1/2 cup pitted green spanish olives, finely chopped
1/2 cup red onion, finely chopped
2 celery stalks, finely chopped
1 red bell pepper, roasted and roughly chopped**
1/4 cup flat leaf parsley, roughly chopped
2 tablespoons capers, rinsed and drained
2 tablespoons jalepeños, finely chopped, seeds and stems removed
1/4 cup extra virgin olive oil
Scant 1/4 cup champagne vinegar
1 1/4 teaspoons kosher salt
1/2 teaspoon freshly ground black pepper
Juice of 1 lemon (squeezed on the salad right before serving)

Supplies- 
Cutting Board
Chef's knife
Baking sheet
Aluminum foil
Small colander (for the capers)
Measuring cups
Measuring spoons
Large mixing spoon
1 large mixing bowl
1 small mixing bowl
Balloon whisk
Large serving platter

Directions-
-Preheat the oven to 400 degrees.
-Line a baking sheet with aluminum foil and place the shrimp on the sheet in a single layer.  Drizzle with extra virgin olive oil, and sprinkle with kosher salt and pepper.
-Bake for 7-8 minutes until light pink.  Remove from the oven and remove the shrimp immediately from the baking sheet.  I usually lift the aluminum foil off of the baking sheet and carefully transfer it to the counter top.  This way the shrimp won't overcook.  Let the shrimp come to room temperature.
-Combine all of the chopped ingredients, cornichons, olives, red onion, celery, red pepper, parsley, jalepeños, and capers into a large bowl.  I have to quickly sauté the onions and celery.  My husband, Jake, can't eat raw celery so I sauté it for 3-4 minutes.  I add in the red onion just to take the bite out.  It's still crunchy and the colors are still vibrant.  If you don't have this situation, it's not necessary.
-When the shrimp is cool add it into the large bowl as well.
-Add in the crab meat and mix everything really well.  You want to see all of the colors evenly distributed in the salad.
-In a small bowl, whisk the extra virgin olive oil,  champagne vinegar, salt and pepper together.
-Pour it over the salad and mix again really well.
-Cover and refrigerate for at least 20 minutes to let all of the flavors come together.
-After 20 minutes, remove the salad from the fridge and cut the lemon in half.  Squeeze the lemon juice on top, catching any seeds.
-You can use a large serving platter or plate individually.  If you plate individually, divide the greens up evenly onto each plate.  If you choose to use a large serving platter, arrange the arugula on the platter and place the salad on top.
-Serve immediately and enjoy!

-Serves 4 adults

*See my video in quick kitchen tips on how to peel and devein shrimp
**You can buy roasted red peppers but I like to roast my own.  Preheat the oven to 425 degrees.  Cut the pepper in half, seeds and stems removed and place on a baking sheet, skin side up.   Roast for 25 minutes.  Remove from the oven and place the peppers in a medium sized bowl.  Cover with aluminum foil for 10-15 minutes.  The skin will peel right off and then you just need to chop when they are cool enough to handle.  I like to do more than one at once and they can keep in the fridge for about one week.  They are great on sandwiches or in dips.  You can also char them on the grill or stove top if you have a gas range.

Friday, July 25, 2014

Quick Kitchen Tip: How to Make a Simple Salad Dressing


La Recette:

Ingredients-

1 teaspoon minced shallots
1/4 cup extra virgin olive oil
scant 1/4 cup red wine vinegar
1 tablespoon Dijon mustard
1 teaspoon maple syrup
1/4-1/2 teaspoon kosher salt
1/4 teaspoon freshly ground black pepper
pinch seasoned salt

Supplies-

Measuring cups
Measuring spoons
Whisk
Medium bowl
Cutting board
Chef's knife

Directions-

Combine all ingredients and whisk together for 10-15 seconds.

*There are a few mistakes in the video. Unfortunately, I could only do one take because I had to pick Gabby up from camp, but I think the message gets across. For reference, it's not a tablespoon of shallots, it's one teaspoon and it's not Dijon dressing but Dijon mustard.
*A special thanks to my friend Natalie for being a great camera person:)

Monday, July 14, 2014

Dairy Free Chocolate Chip Cookie Cake


This dairy free, gluten free chocolate chip cookie cake is so good!  And I love it for a casual dessert in the summer.  It's really quick and all you need is a round spring form pan and basic ingredients for chocolate chip cookies.  My kids absolutely love it and the drizzle of dark chocolate really makes it perfect.  It travels really well, so it's great for picnics and you would never know it's missing dairy and gluten.   My son Mason even took a piece in his lunch when he went to football camp last week.  It's also peanut and tree nut free which is another bonus!  We are all going to an outdoor Bruno Mars concert this week, so I am going to pack a picnic dinner and make this for dessert!  I hope everyone is enjoying their summer nights :)  


Ready to cut and eat!

La Recette:

Ingredients-
8 oz. Earth Balance Vegan Sticks* (2 sticks), room temperature
1 cup light brown sugar
1/2 cup granulated sugar
1 tablespoon vanilla extract
2 extra large eggs, room temperature
2 1/4 cups gluten free baking mix*
1 teaspoon baking soda
1/4 teaspoon kosher salt
1/4 teaspoon cinnamon
2 cups dark chocolate chips - I love the Enjoy Life brand
Canola Oil spray for the spring form pan
4 oz. dark chocolate for the chocolate drizzle on top, melted


Supplies-
2 medium bowls
Measuring cups
Measuring spoons
Stand or hand mixer
10 inch round spring form pan
Small sauce pan
Small mixing spoon
Spatula
Plastic squeeze bottle, optional (for the drizzle)

Directions-
-Preheat the oven to 375 degrees.
-Spray the spring form pan with the canola oil spray (preferably non-GMO) ;)
-With a handheld mixer or a stand mixer with a paddle attachment, beat the butter until soft and creamy - about a minute.  
-Slowly add in the sugar and beat until smooth and incorporated, about 2 additional minutes.  
-Add the eggs in one at time.  Then the vanilla.  Beat until everything is incorporated, scrape down the sides and the bottom with a spatula half way through,  mixture should be smooth.  
-In the meantime, combine the gluten free baking mix, baking soda, kosher salt, and cinnamon.  Mix a few times to combine.
-Next toss in the chocolate chips.  Make sure the flour mixture is coating the chips.  This will help to hold their place in the dough.
-With the mixer running, gradually pour in the flour mixture and mix until just combined.  
-Turn the dough a few times with a spatula to make sure everything is mixed throughly on the bottom.
-Pour the dough into the spring form pan and place on the middle rack of the oven.
-Bake for 25-30 minutes.  The top should be a nice caramel color.
-Remove from the oven and let the cake cool until you can handle the pan.  
-Run a knife paring knife between the cake and pan and gently remove the outer ring.  Also run a knife under the base of the cake and transfer to a serving plate.
-While the cake is cooling set up a double broiler.  Fill the sauce pan about 1/4 full of water.  Place a medium sized bowl on top and put in the 4 oz. of dark chocolate.  
-Bring the water to a boil, and then quickly turn the burner off and let the chocolate melt.
-Make sure the bowl is not touching the water.  Mix with a spoon a few times and then drizzle onto the cake or transfer to the squeeze bottle and decorate as desired.  

*If you don't need dairy free you can substitute butter and if you don't need gluten free you can substitute all purpose flour.
**Serves 8-10

Friday, July 4, 2014

Holy Guacamole


Happy Fourth of July!  I love guacamole.  For me, it is definitely a summer staple and I really only make  it from Cinco de Mayo through Labor Day.  I could make it year round but I prefer to keep it as a special treat for summer time.  You can get avocados all year long from South America but California avocados peak in the summer so it's really the perfect time for guacamole.  I know everyone has a guacamole recipe that they love, but I happen to think that this particular combination of ingredients is a real winner.  If you are making guacamole today for your BBQ, try this recipe.  I think you'll love it!  The combination of lime and lemon juice gives it a really nice zing and sea salt brings in a saltier/brinier flavor.  If you are making guacamole for a group, my suggestion is one 1/2 -1 avocado/person.  Another tip is using flat leaf parsley instead of cilantro.  I happen to love cilantro but a lot of people don't.  I find you either love it or hate it so to make sure that everyone enjoys your guacamole, I use flat leaf parsley.  You can always have some chopped cilantro on the side.  I love the smell of both herbs and this truly is the perfect hors d'oeuvre.  It's vegan, nut free, gluten free, and super healthy.  Everyone can enjoy!  Have a wonderful Fourth of July with your family and friends!


Ready to serve!


Hass Avacados


Les ingrédients...


My guacamole man…love him!

La Recette:

Ingredients-
4 Hass avacados
1/2 cup Roma tomatoes, diced**
1/4 cup red onion, diced
2 tablespoons jalepeño, minced
2 cloves garlic, minced
1/4 cup flat leaf parsley, roughly chopped, plus more for garnish
2 tablespoons freshly squeezed lemon juice
2 tablespoons freshly squeezed lime juice
1 1/4 teaspoons sea salt
1/2 teaspoon freshly ground pepper

Supplies-
2 medium bowls - one for mixing, one for serving
Cutting board
Chefs knife
Paring knife
Spoon
Measuring cups and spoons

Directions-
-Cut each avocado in half and pit each one.  Make horizontal and vertical slices in the avocado so that you have little grid with cubes (about 1/2 inch wide) and spoon out the avocado into the bowl.
-After you have prepared the onion, tomato, jalepeño and garlic, put them into the bowl with the avocado. 
-Add the parsley, lemon juice, lime juice, sea salt, and freshly ground pepper.
-Using the pairing knife make cuts into the avocado to break the bigger pieces down.  I never mash my guacamole.  I like it chunky so just use a knife to cut the bigger avocado pieces and then give it a couple of good mixes with a spoon.
-Garnish with parsley and serve with your favorite chip.

*Serves 4.  If you need to make a bigger batch remember the rule of 1/2 -1 avocado/person and increase each ingredient by a quarter except with the salt and pepper.  Add that in to taste.  
**When you are preparing a tomato, I cut around the seeds in the middle.  Just use the outside flesh.  This way you leave out the seedier/ more watery section.  You can reserve this part for vegetable stock or another use…

-This recipe is being featured as part of the Raise.com Fourth of July Fun Blog.  If you need to purchase a gift card or sell an unwanted gift card, check out:  www.raise.com for a great selection of discounted gift cards.  Raise.com can help you save money on ingredients for this recipe or other summer recipes that you have.  https://www.raise.com/blog/4th-july-fun/

Tuesday, June 24, 2014

Raspberry Breakfast Smoothie


This is just a quick post but this smoothie is fantastic and it will tantalize your taste buds!  The orange blossom honey really creates a great blend of flavors.  You should definitely make it for breakfast tomorrow!  My family and I are in Michigan for a vacation, so my posts this week will be brief but this is a great breakfast or snack and it is so refreshing in the hot summer sun.  I think I will be making this a lot for Mason and Gabby after a long day at camp.  I personally think that raspberries are a perfect food.  They are packed full of vitamin C and have a low glycemic index - meaning they won't make your blood sugar spike.  New research studies have even been started to examine the effects of raspberries contributing to the management of obesity and type 2 diabetes...so interesting!  
Anyways, this is a great recipe for your kids to make with you and it's not very messy - just put all of the ingredients in and blend away!  Happy summer everyone!


I recommend using orange blossom honey or a honey infused with a different flavor undertone like lavender or cloves.  You can use regular honey but I love the orange blossom flavor.  This brand is made in New Jersey and I found it at Whole Foods.

La Recette:

Ingredients-
1 1/4 cup frozen raspberries
1/4 cup sugar
1/4 cup orange blossom honey or regular honey or agave nectar if you need to make it vegan
1/2 cup water
1/4 cup orange juice
1 cup plain greek yogurt, or soy yogurt if you have a dairy allergy or need to make it vegan
2 teaspoons vanilla extract
2 1/2 cups ice
*As a variation, try throwing in a banana.

Supplies-
-Measuring cups
-Measuring spoons
-Blender or food processor, or a Vitamix

Directions-
-Place the raspberries, sugar, honey, water, orange juice, yogurt, and vanilla into a blender and blend until smooth.
-Add in the ice and blend again until smooth.
-The raspberry seeds will be in the smoothie and you can strain it if desired.  I kind of like the seeds :)

*Serves ~ 4. 

Tuesday, June 17, 2014

Related Posts Plugin for WordPress, Blogger...