Saturday, March 29, 2014

Quick Kitchen Tip


I am always trying to create great new snacks for my kids and I'm really excited about this one.  Snacking is serious business in our house so they need to be stellar.  Pictured above are dates with peanut butter and mini dark chocolate chips.  I've always loved dates - they are so sweet and delicious but I've had some trouble getting my kids to eat them.  Add a few chocolate chips et voila, a perfect little healthy snack that is low in sugar and kid approved.  The only down side is that they obviously aren't nut free but other than that they are vegan and free of most other major allergens.  I use an un-sweetend peanut butter and dark chocolate is lower in sugar than white or milk chocolate.  I did some research on dates and the health benefits are astounding.  They are rich in fiber, iron, potassium, and calcium.  They also contain tannins which posses anti-infecive and anti-inflammatory properties.  Dates grow on a specific type of palm tree and are believed to have originated back to the banks of the Nile and Euphrates Rivers.  In fact, the date is one of the oldest fruits in the world - probably first eaten around 6,000 B.C.E.  I thought I would throw in a little history lesson there ;)  Enjoy this super healthy, delectable treat!

La Recette:

Ingredients-
Medjool Dates
Peanut Butter - preferably no sugar added
Chocolate chips - I like mini dark but you can use any variety

Directions-
-Dates have pits but they are very easy to remove.  I always buy them with the pits.  Just make a small slice in the center and with your knife you can easily scrape the pit from the date.
-Open the date up a little and place 1 teaspoon of peanut butter in the middle.
-Sprinkle with a few chocolate chips and you are done!


I like to buy Medjool dates.  They are larger and in my opinion, sweeter than other date varieties.  


This peanut butter is delicious.  No added sugar and it's a great price.  Around $3 for this big tub.   I love Whole Foods!


I am really craving spring clothes so I thought I would post a picture of one of my most coveted shoes for Spring.  I LOVE these.  Lanvin just makes great shoes and this smoking slipper is gorgeous.  
Also, my anniversary is coming up and I'm feeling a bit nostalgic.  These photos were taken in 2005 on our honeymoon in Bali.  Doesn't this just look like heaven?  It was the trip of our lives and we were so lucky to  have the experience.  Bali is one of my most favorite places ever.  The people and the food are  incredible.  I can't believe it was almost 9 years ago!  Happy Anniversary to my wonderful husband.  


Friday, March 21, 2014

Lemon Shortbread Cookies


Yesterday, I was in a little bit of a bind.  My friend Yvette was coming over for coffee and I had nothing to serve with it…literally nothing.  I needed to give Gabby lunch, put her down for a nap and figure out how to make my coffee break delicious.  As I was laying with Gabby, I tried brain storming for a quick recipe that required minimal ingredients because I also needed to go to the grocery store (the "to do" list never ends).  Then, I thought of it…shortbread!  In honor of the first day of spring, I wanted to add something that would reflect the change of season.  I recently bought this beautiful bag of organic lemons and I knew a lemon would work perfectly.  This recipe is so quick and simple - most of the ingredients are probably sitting in your refrigerator.  Another great aspect is that these cookies are nut free, egg free, soy free and can be made dairy free very easily.  Everyone can enjoy these delicious little treats and they are mouth watering.  Rich and buttery with a subtle hint of refreshing lemon, makes a perfect compliment for afternoon coffee or tea.  And when Gabby woke up and Mason came home from school, there was a great little snack waiting for them.  Enjoy these scrumptious cookies and happy spring!  

*The secret to this recipe is ice cold, good quality butter.  Also, the dough needs to sit in the fridge for at least 30 minutes but in a time crunch, the freezer for 15 works well too!

La Recette:  

Ingredients-
1/3 cup granulated sugar, plus more for dusting
1 tablespoon finely grated lemon zest
1 cup gluten free baking mix
1/2 teaspoon sea salt like Maldon or kosher salt works too
1/2 cup cold, unsalted butter cut in small cubes
3 tablespoons heavy whipping cream
1 teaspoon vanilla extract

*If you need this recipe to be dairy free, replace the butter with Earth Balance vegan sticks and use a non-dairy creamer instead of the heavy whipping cream.  If you don't need this recipe to be GF, replace with all purpose flour and add a pinch of baking soda.

Directions-
-In a blender or food processor, combine the sugar and lemon zest.  Pulse until well combined and set aside.
-In the bowl of a stand mixer using a paddle attachment or in a medium bowl using a hand mixer, combine the gluten free baking mix, butter, and salt.  Beat on a low speed until the dough looks crumbly.  2-3 minutes.  Add the sugar mixture, cream and vanilla and beat until the dough comes together.  Do not over beat.
-Remove the dough from the mixer and roll it into a 10 inch log.


-Wrap the dough in plastic and put it in the refrigerator for a least 30 minutes or the freezer for 15 minutes.  Pre-heat the oven to 350 degrees.


-After the dough has chilled, slice it into 1/4 inch rounds


-Place the rounds on a baking sheet lined with parchment paper and give a light sprinkle with granulated sugar. 


-Bake at 350 degrees for 12 minutes or until lightly browned.  Let them cool on the baking sheet and serve immediately.  They can be kept in an airtight container for 4-5 days and the dough can be kept in the freezer for up to one month.


-Make sure you leave ample space in between the cookies.  I put them a little too close together.  Maybe three cookies per row.  
-If you are working in batches, make sure the dough that isn't in the oven, stays in the refrigerator.   
-Makes 24-28 cookies.

Saturday, March 15, 2014

Tarte Aux Fraises


I'm pretty much over winter and ready for spring.  Spring clothes, spring weather, and spring desserts!  Bring it on!  Recipe coming soon…;)

Friday, March 14, 2014

Penne with Turkey Sausage and Broccolini


This is my quickest dinner by far and it's so good!  Mason said this week that it's his second favorite dinner of all time…makes me happy but the best part is that I get to sneak in a little broccolini.  I know some kids really like broccoli but mine have never eaten it willingly so this recipe has definitely helped me squeeze in some "green stuff".  I can have this on the table in 20-25 minutes and there usually aren't leftovers- everybody loves it!  It only requires a few ingredients and the preparation is so easy.  The sausage really flavors the dish so well-add in the broccolini and the cheese and you have yourself a great pasta dish.  If you need dairy free - just leave off the cheese and if you can't find broccolini, you can use the heads of regular broccoli cut in half.  Even the clean up is easy -two pots and one cutting board.  Enjoy this super tasty, easy pasta dinner!   

*Broccolini is similar to broccoli but with smaller florets and longer, thinner stalks.  It is a hybrid of broccoli and gai-lan (Chinese broccoli).


Broccolini before it's been trimmed.


Trim the ends of the broccolini and cut the stalks in half so they are not too thick.


Blanch the broccoli for about 5 minutes until just tender and you'll cook the pasta in the same water.


Place the turkey sausage in the pot and season well.


Cook until nicely browned.


La Recette:

Ingredients- 
1 - 12 oz. package gluten free pasta - I use BioNaturae.  If you don't need gluten free, regular pasta works too.
1 lb. turkey sausage removed from casings (your butcher can do this for you) or ground dark turkey meat
1 bunch broccolini, washed, trimmed and sliced in half
2 cloves garlic minced
3 tablespoons extra virgin olive oil
1/2 cup shredded Parmesan cheese, plus extra for garnish
1/4 teaspoon red pepper flakes (optional) - I usually leave this out if the kids are eating  
Kosher salt
Freshly ground pepper

Directions-
-In a large sauce pan, heat 2 tablespoons of olive oil.  Add the garlic and cook until fragrant - about one minute.  Add the turkey sausage, 1 teaspoon of kosher salt and 1/2 teaspoon of freshly ground pepper and sauté until nicely browned.  
-In the meantime, bring a medium pot of salted water to boil.  Add the broccolini and cook until just tender.  About 5 minutes.  Have a large bowl of ice water on the side.  Once the broccolini is tender, scoop it out with a slotted spoon and place it in the ice water.  This is blanching and shocking.  It allows the broccolini to keep it's bright, vibrant color.  After it sits for about 10 minutes, drain the broccolini well and add to the sausage.  Make sure the heat is off.  Mix well. 
-Making sure the water is boiling and in the same pot that you used to blanch the broccolini, add the pasta and 1 tablespoon of extra virgin olive oil.  Cook until al dente and reserve a 1/4 cup of the pasta water.  Drain well and add the pasta to the broccolini and sausage.  Mix well and add 1/4 cup of the pasta water.  Let it sit for two minutes and then add in the cheese.  Add in 1/2 teaspoon of kosher salt and give everything a good mix.  
-Spoon into bowls, sprinkle with a little Parmesan and serve warm.

*Serves 4  

Thursday, March 6, 2014

I Heart Hamentashen


It's almost Purim time, and I wanted to post the BEST Hamentashen recipe.  It comes from ma belle mère (Mother-in-law), Leah Rosenberg.  It sounds so much nicer in French.  Anyway, she is a great baker and it's her recipe that I made gluten free and if you don't need it to be gluten free you can just replace the gluten free baking mix with regular flour - cup for cup.  They are so tasty - if there was a contest, I think I might win a blue ribbon ;)  The dough is great.  It's sweet and light and it rolls out really well. The best part is that you can create your own customized Hamentashen.  Pictured above are apricot (my personal favorite) and chocolate chip with Nutella.  I've also made strawberry chocolate chip with strawberry jam.  Other ideas are peanut butter and jelly, lemon meringue, blueberry, or caramel.  It's fun to experiment and come up with different flavor combinations and it's also a great recipe to do with kids - very hands on.  Happy Purim!  Even if you don't celebrate, it's a delicious cookie so try it out and enjoy!

A few important notes when making this recipe and working with gluten free dough in general:

1.  All pastry dough needs to be cold, but this is especially true with gluten free dough.  When it gets too warm, it will just fall apart.  So these cookies in particular require a lot of in and out the the freezer/fridge.  I'll explain more below.  Don't get discouraged.  Once you get the hang of it, it's not hard at all.
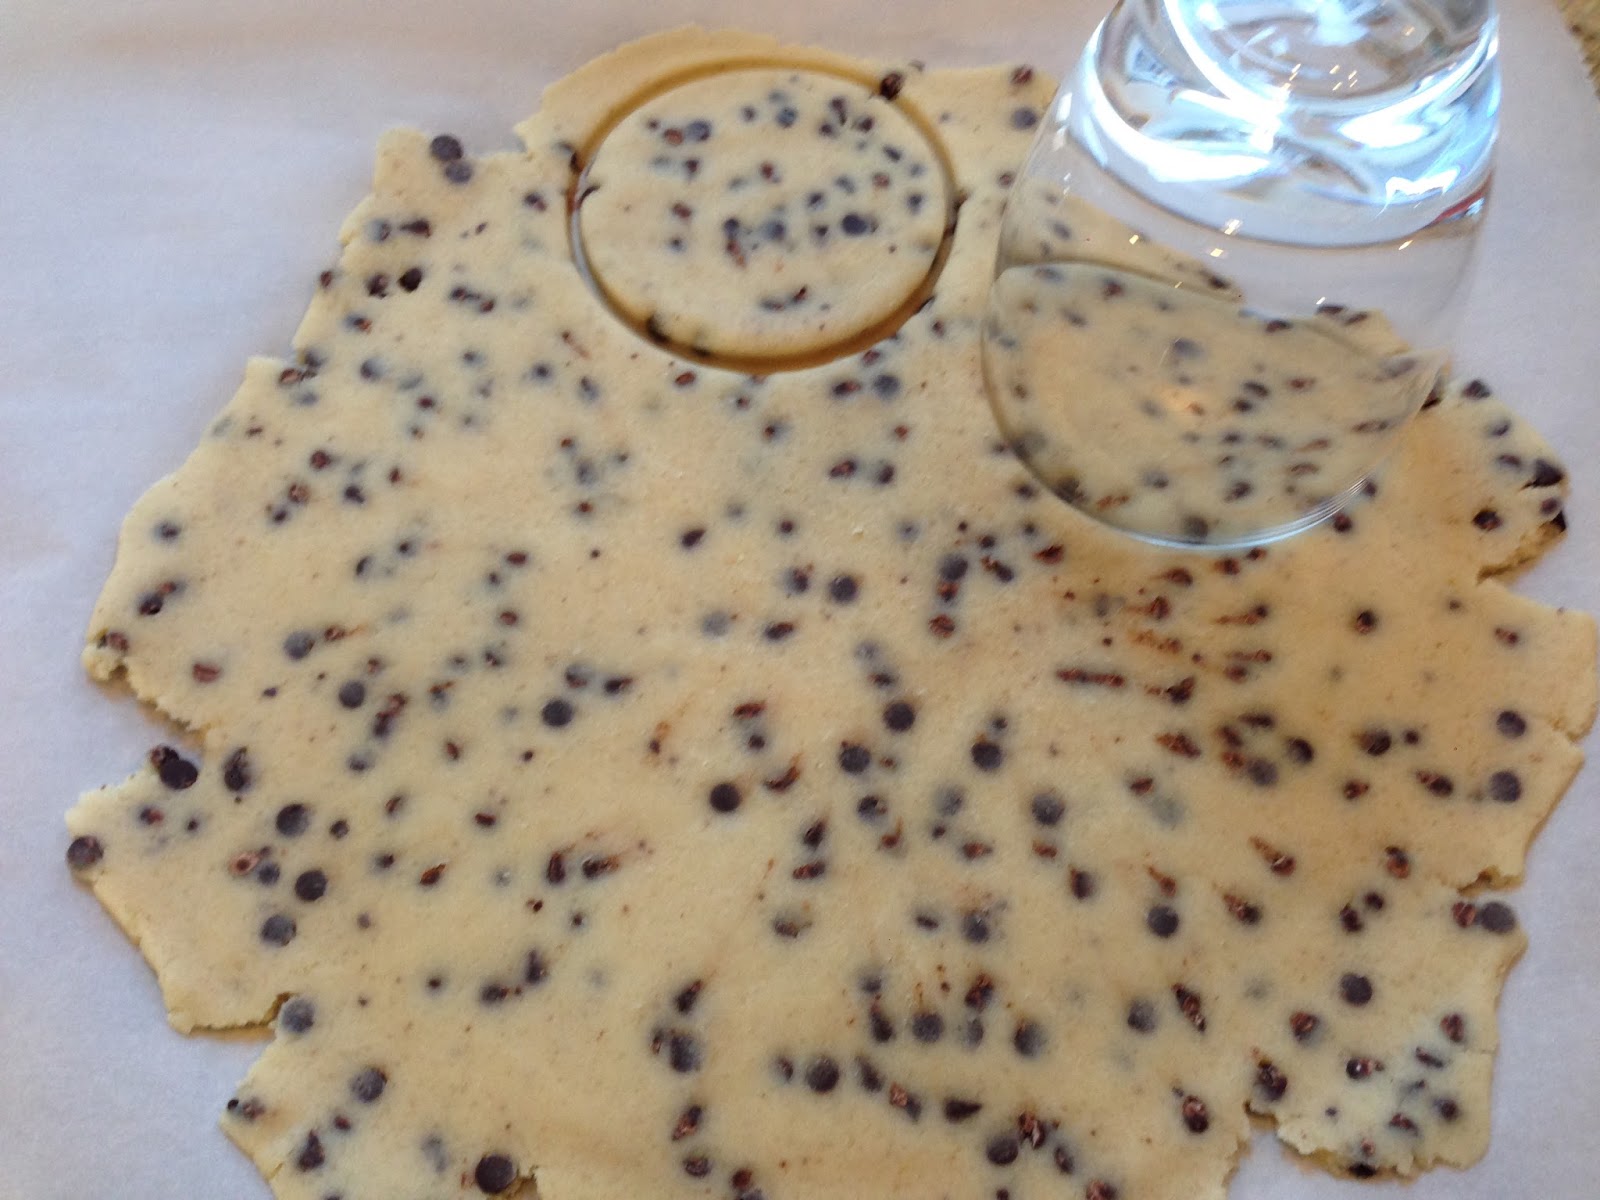
2.  Once the dough is initially refrigerated and ready to be rolled out, you need to work quickly.  Place the dough in-between two sheets of parchment paper.  Starting from the center and working out to the edges, roll the dough out, turning occasionally.  It should be about an 1/8 inch thick.  Don't worry to much if the dough starts to crack around the edges.  If the cracks seem to work their way to the center, just push the dough back together with your fingers.
3.  Once you have made the round disks with a cookie cutter, put the filling in the middle and use a spatula to help left the disk onto the baking sheet, then you can fold the edges.  If the dough seems to be  too warm at this point put it in the freezer for 5-7 minutes or the fridge for about 20 minutes and start again.
4.  Once the cookies are folded and before baking, I put them back into the fridge or freezer for the amount of time listed above.  I find that it helps the cookies hold their shape.

La Recette:

Ingredients-
1/2 cup unsalted butter, room temperature
3/4 cup granulated sugar
1 extra large egg, room temperature
1 teaspoon vanilla extract
2 tablespoons milk
2 cups gluten free baking mix
2 teaspoons baking powder
*Have whatever filling you want to use on hand.  For the Hamentashen listed above you'll need 1/4 - 1/2 cup of mini chocolate chips and Nutella.  Also, I used apricot jam.  I use 1/2 teaspoon for the filling.   It's just enough.

Directions-
*You'll need a rolling pin, a least two baking sheets, parchment paper, and a 3 -inch round cookie cutter.  I use a glass from my kitchen.
-Pre-heat the oven to 350 degrees F and line two baking sheets with parchment paper.
-In a small bowl, combine the gluten free baking mix and the baking powder.  Set aside.
-Cream the butter and sugar until light and fluffy.
-Slowly add the egg, vanilla and milk.  Make sure it is all incorporated well, scraping the sides of the bowl a few times with a spoon.
 -Add in the gluten free baking mix and mix until just combined.  For the recipe above, I roughly split the dough in half and removed half from the mixer.  I then added 1/4 cup of mini chocolate chips and mixed until just combined.  If you want the entire batch with chocolate chips, use 1/2 cup and don't split the dough in half.


-Shape the dough into two disks and cover with plastic wrap.  It would classify it as a heartier dough, so it should not be loose.
-Refrigerate the dough for at least an hour.  The dough will also keep in the fridge overnight or in the freezer for up to a month.
-In between two sheets of parchment paper, roll the dough to about 1/8 inch thick.
-Using a 3 inch round cookie cutter make your flat disks.  *The first disk gave me 6 rounds, so I had 6 chocolate chip with Nutella and 6 apricot from the first roll.  I gathered up the extra dough, put it back in the fridge for about 20 minutes and re-rolled it.  This gave me 6 more.  *This recipe will give you 16-18 cookies but it can be doubled if you need more.


-Top each round with 1/2 teaspoon of filling.


-Using a spatula, lift the rounds off of the parchment and place them onto the baking sheet lined with parchment paper.


-Shape into triangles by pinching the edges (3 corners).


-Put in the freezer for 5 minutes or the fridge for 20 minutes.
-Bake for 16-18 minutes until lightly browned.
-Remove from the oven and let them cool completely on the baking sheet.
-Store in an airtight container.
*Try not to use a warm baking sheet when working in batches. The colder the better.

Friday, February 28, 2014

Marvelous Madeleines


I love these delicious little treats.  They are so light and fluffy and this particular version reminds me of spring, which I am desperately craving right now!  Dipped in a fresh orange juice glaze, they have the perfect amount of sweetness.  Their crisp edges and soft, buttery middle is a combination for a really wonderful cookie.   I love to have them with coffee or tea and my whole family gobbles them up.  Gabby seems to take the most enjoyment from licking off the glaze.  I'll have to talk to her about eating the whole cookie ;)  They are also great to have around when you have guests over.  The dough keeps in the fridge for about three days making it really easy to throw together for company.  Enjoy! 


This is what the dough looks like before it's chilled.  It's not too thin and kind of ribbons well.  


After it's chilled (30-60 minutes), the dough becomes a little thicker, but it shouldn't be too thick.  It should slowly and easily spread into the mold.  I pour a 1/4 cup of cold milk into the dough after it comes out of the refrigerator and mix well.  Then I fill the madeleine tray.  


I use a full tablespoon to fill each mold.

La Recette:

Ingredients-
1 1/2 cups gluten free baking mix
3/4 cup granulated sugar
1 1/2 sticks unsalted butter, melted (I try to buy European style butter)
3 extra large eggs
1 teaspoon vanilla extract
1 tablespoon freshly squeezed orange juice
1/3 cup milk, plus another 1/4 cup after it's taken out of the refrigerator
1 1/2 teaspoons baking powder
Non stick cooking spray - I use a Canola Oil based spray 

For the glaze- 
1 cup confectioners sugar, sifted
4 tablespoons freshly squeezed orange juice
*The glaze is optional.  You could also use melted chocolate, sprinkle confectioners sugar on top, or just enjoy as is.

Directions- 
*You'll need a non-stick Madeleine pan, Williams Sonoma or Sur la Table sell them.  They are around $20.  Minor investment for a delicious reward ;)
-Pre-heat the oven to 425 degrees.
-In a medium sized bowl, combine the eggs, sugar, vanilla extract, and orange juice.  Using a balloon whisk, mix well for 2-3 minutes.  
-In a small bowl, combine the gluten free baking mix and baking powder.  Mix well. 
-Working in batches, and alternating with the milk, mix the gluten free baking mix into the egg and sugar mixture.  *You'll start with the gf mix, then milk, gf mix, milk, and end with gf mix.  Make sure everything is well combined.
-Next, take the warm, melted butter and pour it into the dough.  Mix well until everything is incorporated, smooth and shiny.  
-Put the dough into the refrigerator and chill for 30-60 minutes.  *Madeleines characteristically have a hump on the top and you won't have this if the dough isn't refrigerated.
-Spray your Madeleine pan with non-stick cooking spray.  *I've buttered and gf floured the pan before and I've found that the spray works better.
-Take the dough out of the fridge and mix in 1/4 cup of cold milk.  I use skim but any kind will do.  
-Make sure that it's mixed well and using a tablespoon, fill each mold with one scoop. 
-Bake for 6-7 minutes.  Until the edges are lightly browned and the cookie springs back when touched.
-Remove them from the oven and then remove the cookies from the pan onto a drying rack.  They should release with minimal effort.  
-Once they have cooled, you can dip them in the glaze if you like.  Make sure the sugar is sifted.  Confectioners sugar tends to clump and you want it really smooth.  Add in the orange juice and whisk well for 20-30 seconds.
-I typically dip the hump side into the glaze but either side is fine.  Let any excess drip off and voila - you are done.  Let them dry for about 20 minutes before serving.  

*Makes 30-32 cookies.  Best enjoyed right out of the oven but they keep for about 3-4 days if they are well covered.  When I make them, they are usually gone after 1-2 days :) 
*When you start baking, make sure you put the dough back in the fridge in-between batches.     

Saturday, February 22, 2014

Mediterranean Style Ahi Tuna & Black Pearl Rice


Great with a glass of Sauvignon Blanc.  I love Peju 2013 Sauvignon.  


I love this brand of rice.


This recipe calls for 4 - 6oz. pieces of Ahi Tuna.

I am all about simple and easy this week.  As time just seems to fly by faster and faster, I need recipes that are tasty, quick, and healthy. This one hits all three and it's fabulous.  I wanted to expand my kids fish palate and I thought Ahi Tuna was a great option because there is no fishy taste whatsoever.  Attention - if you don't eat fish, try this recipe!  You will soon say that you are a fish eater.  There is a definite meaty-like texture similar to chicken or steak and my kids ate it up.  They weren't so keen on the mediterranean garnish on top but we'll get there.  They also loved the black pearl rice.  It's so good.  It has a different texture than traditional rice and the feta gives it a great pop of flavor.  Again, my kids pushed the asparagus aside but it's important to just keep putting it on their plate.  I'm always trying to expand the tastes, flavors and textures of what they will eat.   Try this recipe.  It's so flavorful and super healthy.  The zesty mediterranean salad on top complements the fish so well and the feta, asparagus rice combo is great!  Enjoy!     

La Recette:

Ingredients-
*You'll need a grill,  grill pan, or believe it or not- I used a panini press!  
4 - 6 oz. pieces Ahi Tuna
1/2 English cucumber, quartered
1/2 medium red onion, finely chopped
2 tablespoons capers
1/4 cup sun dried tomatoes, roughly chopped
1/2 cup Kalamata olives, halved
2 tablespoons Italian Parsley, roughly torn
2 tablespoons Extra Virgin Olive Oil, plus more for the Ahi Tuna
2 tablespoon freshly squeezed lemon juice
1 cup asparagus, washed, trimmed and cut into 1 inch pieces
1/4 cup crumbled feta cheese
1 1/4 cups black pearl rice
Kosher salt 

Directions-
-Take the tuna out of the refrigerator about 20 minutes before grilling.  Drizzle each side with olive oil and sprinkle each side with kosher salt to taste.  Set aside
-Combine the cucumber, onion, capers, sun dried tomatoes, Kalamata Olives, parsley, 2 tablespoons of extra virgin olive oil, 2 tablespoons of lemon juice, and a 1/2 teaspoon of kosher salt in a bowl and mix well.  Set aside.
-The next step, I like to do about an hour before I plan on serving dinner.  Fill a medium sized sauce pan 3/4 full of water.  Bring to a rolling boil and pour in 1 1/2 cups of the black pearl rice.  Mix well and cook for 25-30 minutes.  When the rice is almost done (take a spoon and pull out a couple pieces to check) drain it through a strainer.  Place the strainer on top of the saucepan, cover it and let it steam for 10 minutes.
-Fill another medium sized sauce pan half way full of water and bring to a boil.  Have a medium sized bowl of ice water ready.   Put the cup of 1 inch asparagus pieces in the boiling water and cook for about 5 minutes.  Using a slotted spoon, remove them from the water and place in an ice bath.  This is blanching and shocking.  The asparagus will be tender but retain their color.  After 8-10 minutes, drain the asparagus and set aside.
-Once, the rice has steamed, let it sit at room temperature for about 10 minutes.  Using a fork fluff it up and mix in 1 teaspoon of kosher salt.   Next, mix in the asparagus and feta cheese.
-The last step, make sure your grill pan is hot.  Place the tuna on the grill pan, you should hear a nice sizzle, and cook for about 30-40 seconds on each side if you like it seared rare which I recommend.  You can cook it a little longer if you want it pink inside but keep in mind that it will cook quickly and can become chewy if it's overcooked.    
-Also, if your are looking for nice grill marks, about halfway through cooking on each side, turn the fish about 45 degrees (slightly perpendicular). 
-Slice the tuna on the bias and spoon the mediterranean salad on the top.

*Serves about 4 people.   


On a side note, you know that fashion is one of my loves and I have to share two jaw dropping images that I saw this week.  The first is Lupita Nyong'o at the BAFTA's in a Christian Dior gown.  To me, this is style perfection.  She is gorgeous.  The color -amazing.  The cut - perfect.  The gold metal belt and cuffs - stunning.  I love this look.  It's such a great choice and I am going to watch 12 Years a Slave this weekend.    
The second photo is from the Michael Kors 2014 Fall Ready-to-Wear Collection.  It's just beautiful.  Michael Kors is a genius.  Suede fringe and chunky knits…c'est merveilleux!  


Photo by Mike Marsland/WireImage


Photo: Kim Weston Arnold/ Indigitalimages.com

Related Posts Plugin for WordPress, Blogger...